

This is quick 5-step guide on how to simply color a mushroom like the one you see on the photo. You'll only need 3-4 colored pencils of your choice and a blender or paperstump, if you wish so.

Step 1: Choose 3-4 colored pencils. Take your darkest pencil and add shading all the way around the mushroom. Apply pressure right at the black line and go softer and softer as you move towards the center to create a soft transition between the colors. I recommend to color in small circles.
I'm using Derwent Coloursoft in Loganberry for this step.

Step 2: Take your second lightest pencil and use the same technique as in step 1. Apply pressure on the dark pencil and go softer towards the center. The colors should blend together as they do on the photo.
I'm using Derwent Coloursoft in Cranberry for this step.

Step 3: Take your medium color and repeat the technique again to blend the colors. If you're coloring a smaller area you can stop here or go to step 5, if you want to blend the colors more.
I'm using Derwent Coloursoft in Blush Pink for this step.

Step 4: Now it's time to add your lightest color to create the highlight and blend the colors a bit more.
You can stop here if you feel that your colors are blended enough or proceed to the next step to get some easy blending tips.
I'm using Faber-Castell Polychromos in Light Flesh for this step.
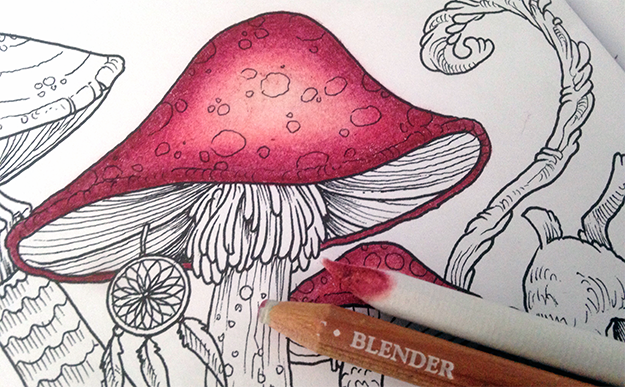
Step 5: It's time for blending. You can use your lightest pencil to go over everything quite hard, but it will most likely lighten everything a bit. You can also use a blender pencil, which is my preffered method. I'm using the Derwent Blender, but keep in mind that it can smudge the black lines and grey the colors a bit. If you don't want to risk changing the colors, then you can use a paper stump. It's not as effective, but it's better than nothing.
Please comment if you have any questions!
No comments :
Post a Comment